How to Improve Your Soundproofing: Solutions for Every Budget
Practical soundproofing improvements ranked by cost and effectiveness — from free quick wins to serious upgrades for walls, doors, windows, and ceilings.
From the team behind the QuietScore iOS app
You’ve identified a soundproofing problem. Maybe you tested your barriers and found a weak spot, or maybe the neighbor’s bass is driving you crazy. Either way, you want to fix it.
This guide covers every practical soundproofing improvement — organized from cheapest and easiest to most effective (and expensive). Start at the top and work down.
Before You Spend Money
Rule #1: Seal the gaps first
Sound follows air. If air can get through, sound can get through. Before adding mass, insulation, or anything else, find and seal every air gap.
The impact is dramatic: a wall with 1% of its area open to air gaps loses up to 50% of its soundproofing performance. A $5 tube of acoustic caulk can outperform $500 of added drywall if the gaps aren’t sealed.
Common gaps to check:
- Under the door (the biggest offender)
- Around the door frame
- Electrical outlets and switch plates on shared walls
- Where walls meet the floor and ceiling
- Around pipe and duct penetrations
- Window frames and seals
- Recessed lighting cans in ceilings
Rule #2: Fix the weakest link
Upgrading a decent wall while ignoring a hollow-core door is like installing a security system but leaving the front door open. Always fix the weakest barrier first.
If you haven’t tested yet, see our How to Test Soundproofing guide to find your weak points.
Tier 1: Free to $50 (Quick Wins)
These fixes take minutes to hours and cost almost nothing. They won’t transform a bad room into a recording studio, but they often make a noticeable difference — especially if air gaps are your main problem.
Door gap sealing ($5–$25)
The problem: The gap under most interior doors is 5–15mm. That’s a huge opening for sound.
The fix:
- Door sweep ($8–$15) — Attaches to the bottom of the door, seals the gap when closed. Automatic door sweeps are best because they lift when the door opens (no dragging on carpet).
- Weatherstripping ($5–$10) — Self-adhesive foam or rubber strips around the door frame. Seals the gap between door and frame on all three sides.
- Draft stopper (free–$10) — A rolled towel or fabric tube placed at the base of the door. Temporary but surprisingly effective.
Expected improvement: 3–8 STC points on a door that had significant gaps. One of the highest ROI soundproofing fixes.
Seal wall penetrations ($5–$15)
The fix:
- Acoustic caulk ($8–$12 per tube) — Flexible, non-hardening sealant. Apply around outlets, switch plates, baseboards, and any visible cracks.
- Outlet gaskets ($5 for a 10-pack) — Foam gaskets that sit behind outlet and switch covers on shared walls.
- Putty pads ($15 for a 6-pack) — Fire-rated putty that wraps around the electrical box inside the wall, sealing the opening.
Rearrange furniture (free)
Sound energy decreases with distance. Strategic furniture placement won’t stop sound but can reduce the perceived volume:
- Place a bookshelf (filled with books) against the noisy wall — mass reduces transmission
- Move your bed or desk away from the shared wall
- Hang heavy curtains or tapestries on the wall — minimal effect on transmission, but reduces reflections that amplify the perceived noise
Tier 2: $50–$300 (Meaningful Improvements)
These fixes require more effort but deliver substantial, measurable improvement.
Upgrade to a solid-core door ($80–$250)
The problem: Most interior doors are hollow-core — essentially two thin panels with a cardboard honeycomb inside. They weigh about 12 kg (26 lbs) and have an STC of 20–25.
The fix: Replace with a solid-core door. These weigh 25–35 kg (55–77 lbs) and have an STC of 30–35. Combined with proper sealing (see Tier 1), a solid-core door can reach STC 35–38.
What to look for:
- Solid particleboard or MDF core (not hollow)
- 44mm minimum thickness
- Proper hanging with no gaps visible around the frame
- Self-closing hinges prevent being left ajar
Expected improvement: 8–15 STC points over a hollow-core door (with sealing).
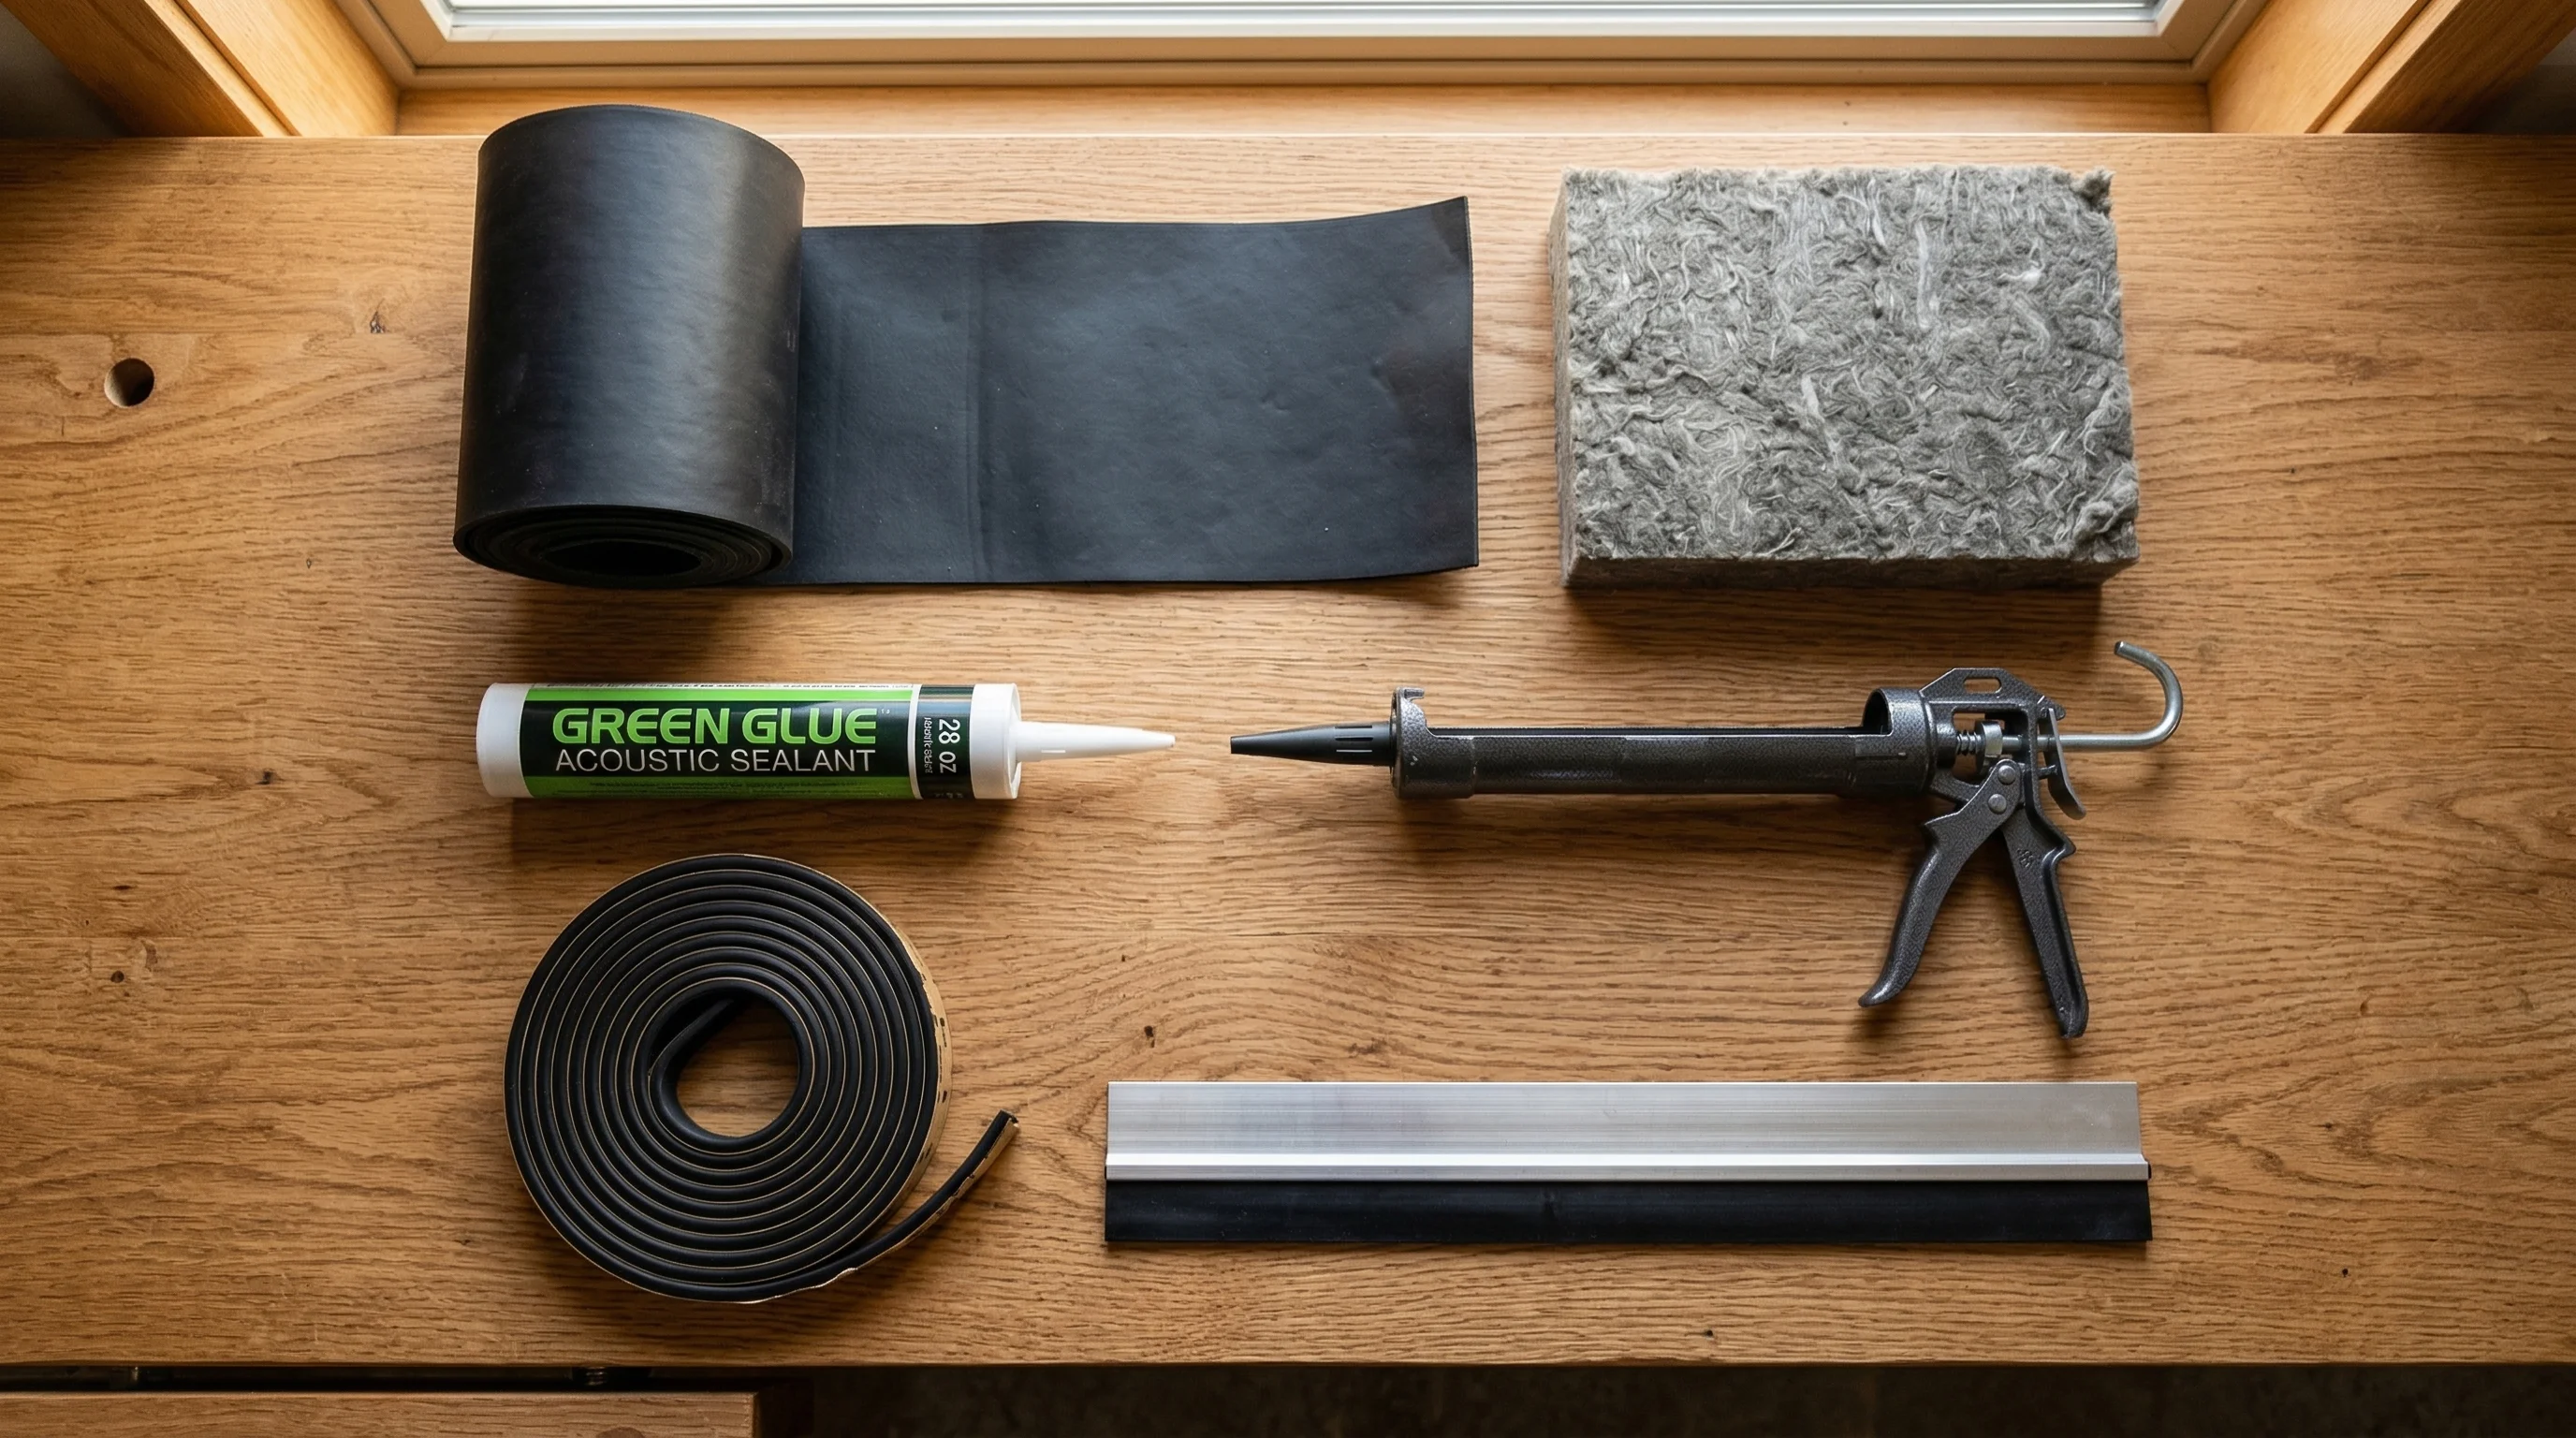
Add mass loaded vinyl (MLV) to walls ($1.50–$3/sq ft)
What it is: A thin, dense, flexible material (about 5mm thick) that weighs roughly 5 kg per square meter (1 lb/sq ft). It’s the most effective way to add mass to an existing wall without major construction.
How to install:
- Cut MLV to fit the wall area
- Attach directly to the wall with construction adhesive and screws
- Seal all seams with acoustic caulk
- Cover with a new layer of drywall for a finished look (optional but recommended)
Expected improvement: 3–7 STC points depending on the existing wall construction.
Window treatments ($50–$200)
For single-pane windows:
- Heavy soundproof curtains ($50–$100) — Reduce high-frequency noise somewhat, but don’t expect miracles. They help more with echo reduction than transmission.
- Window plug ($30–$80 DIY) — A tight-fitting panel of MDF + acoustic foam that presses into the window opening. Ugly but effective for bedrooms at night.
- Secondary glazing ($150–$300) — An interior acrylic panel mounted with a 100mm+ air gap from the existing window. Significantly better than curtains.
Seal HVAC ducts ($20–$100)
The problem: Ducts connect rooms with direct air paths. Sound travels through them easily.
The fix:
- Line the inside of ducts with acoustic duct liner at bends
- Install duct silencers ($40–$80) at room supply/return points
- Ensure all duct connections are sealed — leaky joints transmit both sound and conditioned air
Tier 3: $300–$2,000 (Serious Upgrades)
These are proper construction projects that require tools, time, and some skill.
Add a second layer of drywall ($0.50–$1.50/sq ft)
How it works: Mass blocks sound. Doubling the drywall doubles the mass on that wall face.
Best practice:
- Apply Green Glue damping compound ($15/tube, 2 tubes per 4×8 sheet) to the new drywall
- Screw the new layer over the existing drywall
- Seal all edges with acoustic caulk
- Tape, mud, and finish as normal
Why Green Glue matters: Two layers of drywall alone add about 5 STC points. Two layers with Green Glue between them add 8–12 STC points. The damping compound converts vibration energy into heat, dramatically improving low-frequency performance.
Expected improvement: 8–12 STC points with Green Glue, 4–6 without.
Install resilient channels ($1–$2/linear ft)
How it works: Metal channels screwed to the studs, with drywall screwed to the channels instead of directly to the studs. This decouples the drywall from the structure, breaking the direct vibration path.
Critical installation details:
- Channels must not touch the floor, ceiling, or adjacent walls — or you “short circuit” the decoupling
- Never screw through the channel into the stud — this defeats the purpose
- Not recommended as a DIY project unless you’re experienced — poor installation can make things worse
Expected improvement: 5–12 STC points when installed correctly.
Insulate wall cavities ($0.50–$1.50/sq ft)
If you’re already opening up a wall (renovation or new construction), fill the cavity:
- Mineral wool (Roxul/Rockwool Safe’n’Sound) — Best for sound, naturally fire resistant
- Fiberglass batts — Cheaper, nearly as effective for sound
- Fill the cavity fully but don’t compress — compression reduces acoustic performance
Expected improvement: 4–8 STC points in an empty wall cavity.
Tier 4: $2,000+ (Maximum Performance)
For home theaters, music studios, or serious noise problems.
Staggered or double stud walls ($5–$15/sq ft)
Build a second wall with its own stud frame, completely separate from the existing wall, with a 25mm+ air gap between them. Fill both cavities with mineral wool. This eliminates structural sound transmission.
Expected performance: STC 55–65 depending on construction details.
Acoustic doors ($500–$3,000)
Purpose-built doors with solid cores, perimeter seals, automatic drop seals, and sometimes laminated glass vision panels. STC ratings of 40–55.
Floating floors ($5–$20/sq ft)
A floor system decoupled from the structural floor below using neoprene pads or specialized isolation mounts. Essential for rooms below occupied spaces.
How to Choose the Right Fix
Match your fix to your test results:
| Frequency problem | Best solutions |
|---|---|
| Low bass (under 250 Hz) | Add mass (double drywall, MLV), decouple (resilient channels), floating floors |
| Speech range (250–2000 Hz) | Seal gaps, upgrade doors, add insulation to wall cavities |
| High-frequency leakage | Find and seal air gaps — even tiny ones let high frequencies through |
| Everything leaking | Major air gap somewhere. Find it first (usually the door). |
Match your fix to your budget:
| Budget | Best approach |
|---|---|
| $0–$50 | Seal every gap: door sweep, weatherstripping, acoustic caulk |
| $50–$300 | Upgrade door to solid-core + full sealing package |
| $300–$1,000 | Add second drywall layer with Green Glue on problem wall |
| $1,000–$3,000 | Full wall treatment: insulation + resilient channel + double drywall + Green Glue |
| $3,000+ | Room-within-a-room: double stud wall, floating floor, acoustic door |
Measure Your Improvement
After making changes, test again with the same method you used for your baseline. This tells you:
- How many STC points you gained
- Whether the fix addressed the right frequencies
- If there are remaining weak points to address
The QuietScore app makes this easy — run the test before and after, and compare your scores and frequency breakdowns.
Next Steps
- Soundproofing 101 — Understand the fundamentals
- How to Test Soundproofing at Home — Find your weak points first
- How to Soundproof a Door — Deep dive on the most common weak point
- Sound Frequency Guide — Understand which frequencies you’re fighting
- Best Soundproofing Materials — Product comparisons